The LINK7 firmware
Programming the LINK7
On this page we list instructions on how to create custom applications for the link7 and how they can be programmed using the serial-to-USB converter.
windows drivers
To program the link7, the device will need to be connected to a computer. This connection is handled by the on board serial-to-USB converter. A windows PC will require a driver to be installed for this chip. This driver can be downloaded from the USB drivers section on Olimex ESP32-PoE.
Writing custom firmware
In the Sub-IoT-Stack submodule, there’s a folder ‘apps’ containing a ‘link7-basic’ folder. This folder represents the current application running on the link7. This application transmits a message upon button press and transmits a message every 5 minutes with the device state file.
Flashing custom firmware
When your firmware is fully built (build instructions) without any errors, the firmware-files should be available in the build folder.
Make sure the link7 gateway is plugged in through the micro USB connector to your computer.
Flashing the firmware is done through the STM32CubeProgrammer.
Open up the programmer and select ‘UART’ as the source:

Now activate the bootloader on the LINK7 by pressing the ‘prog’ button. It is the button located towards the middle of the device close the antenna connector.
Click the refresh button next to the port. Your device should pop-up as one of the options. Select it and press the ‘Connect’ button.
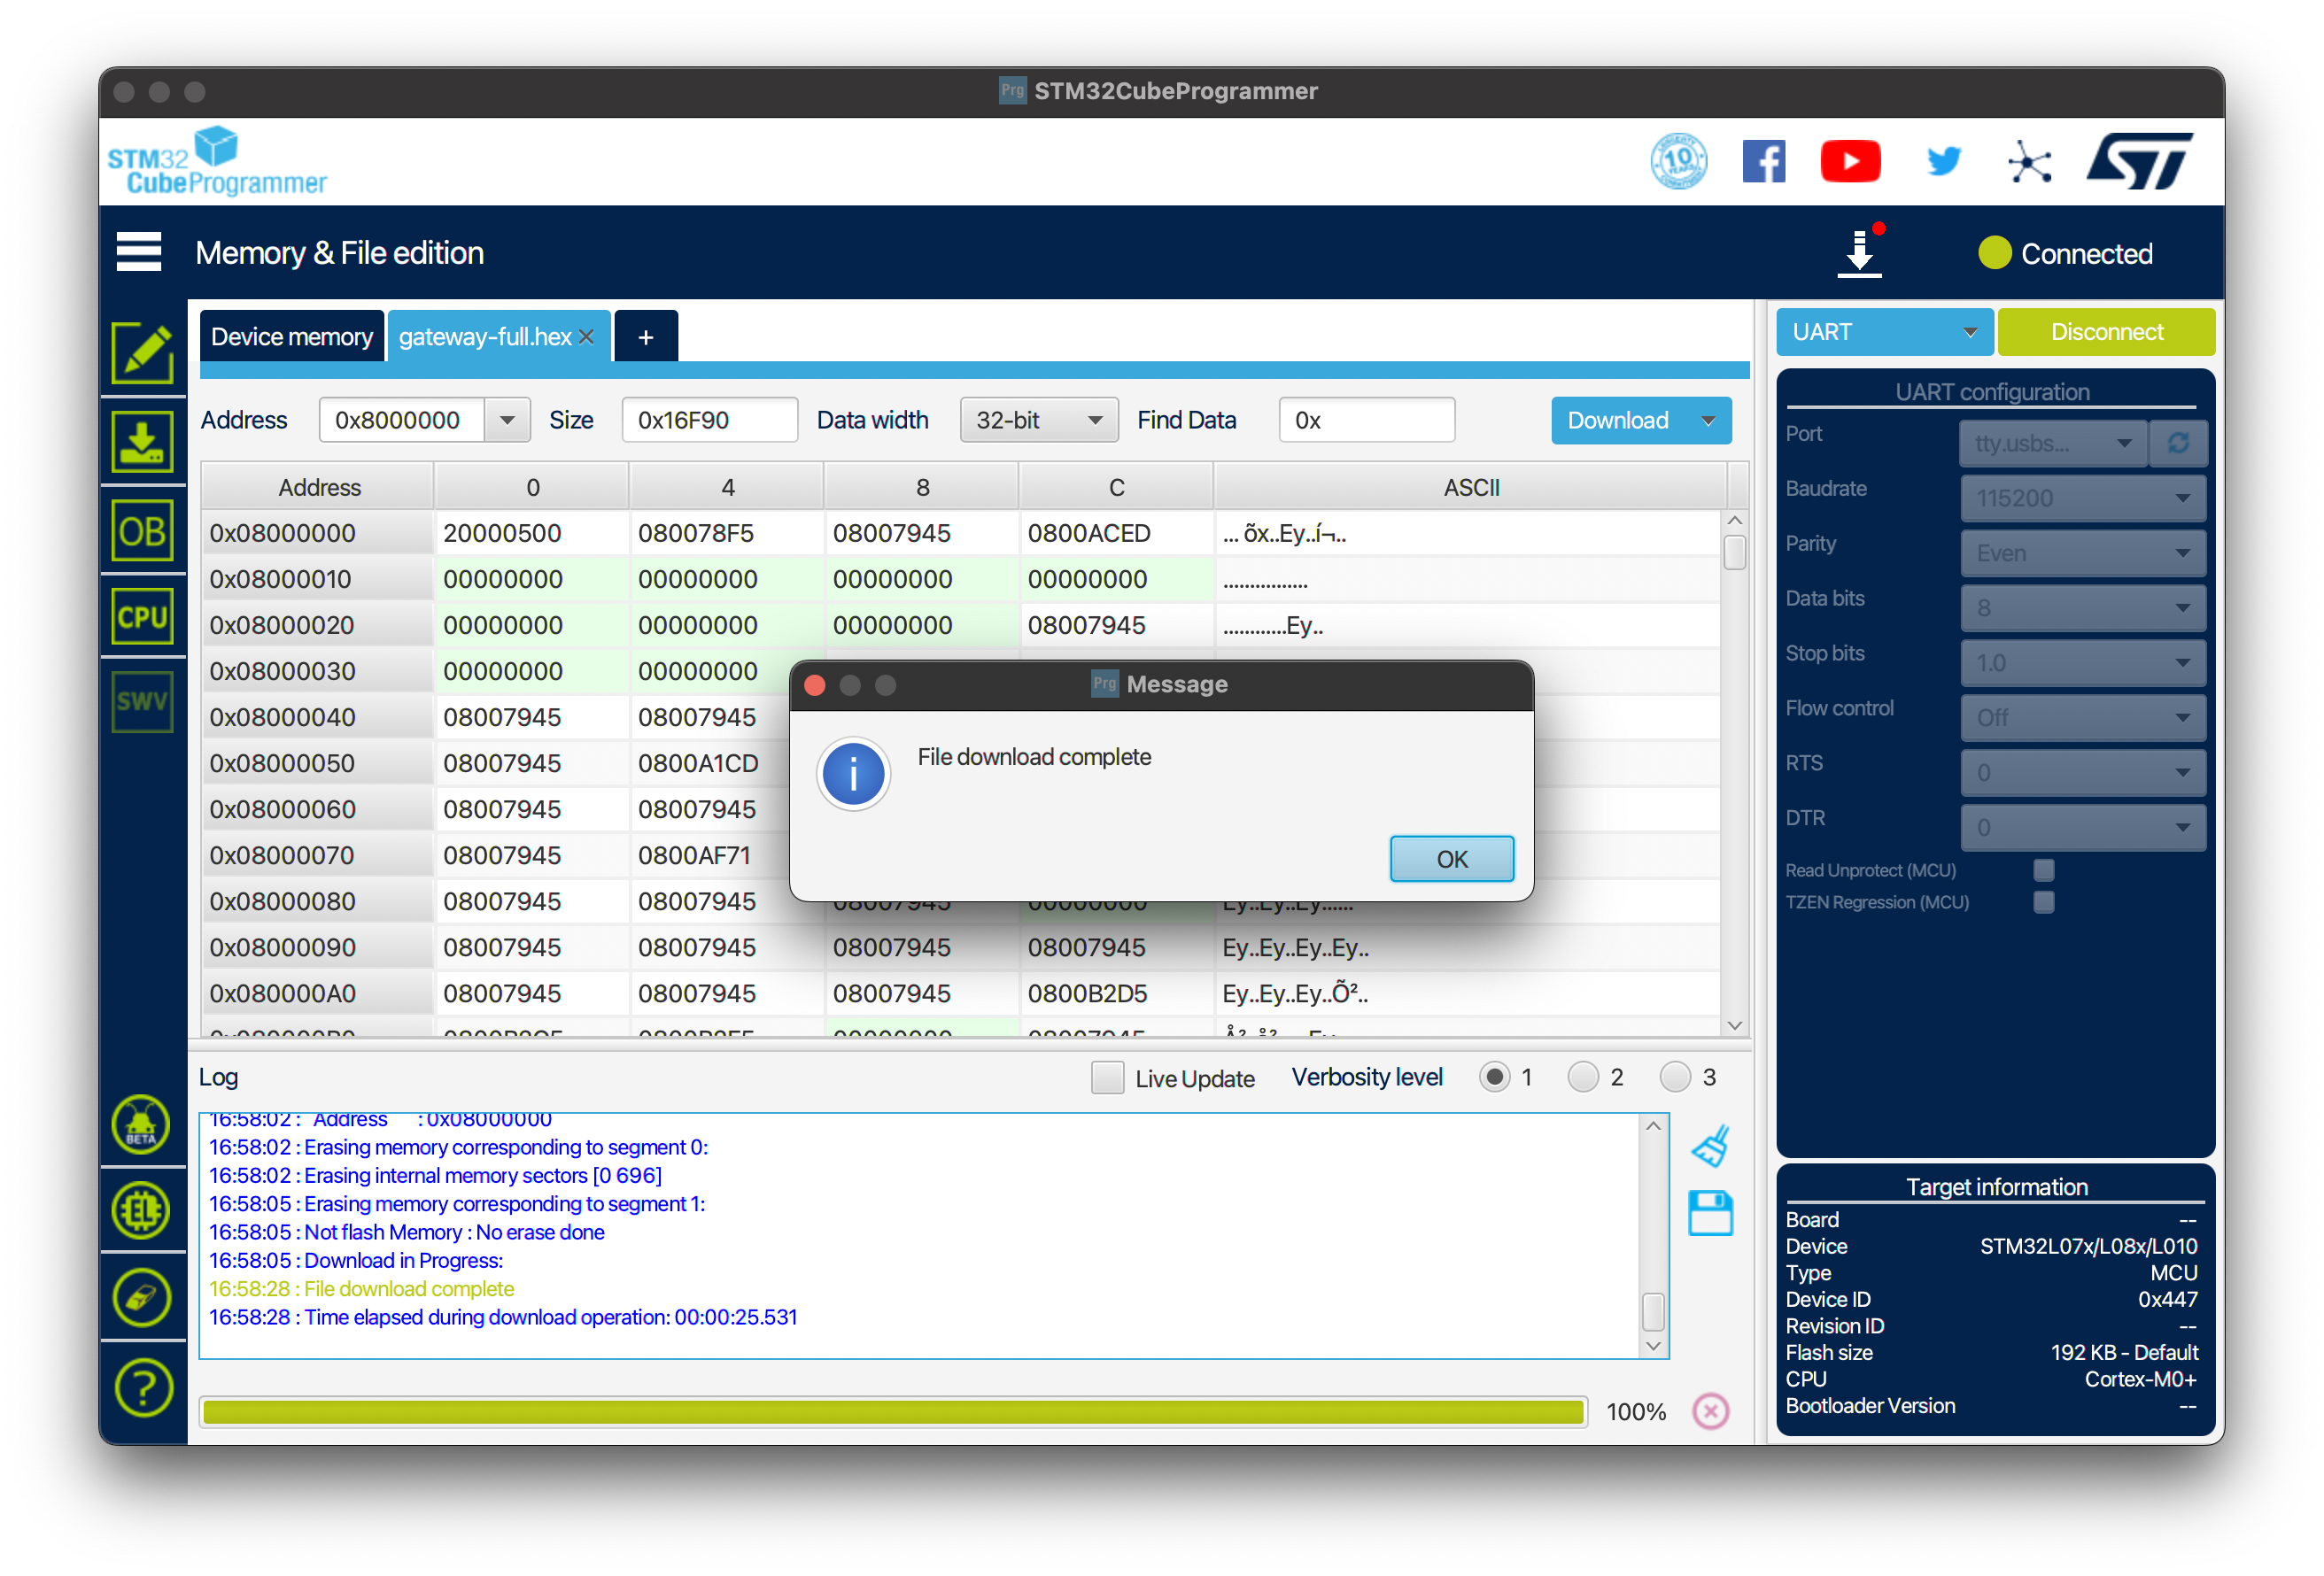
Now press the ‘Open file’ button and select your firmware file (/your/path/LiQuiBit/build/Link7-release/apps/link7-basic/link7_basic-full.hex). Then select ‘Download’ and it will start flashing the device. When it’s done, a pop-up will show ‘File download complete’.